About this deal
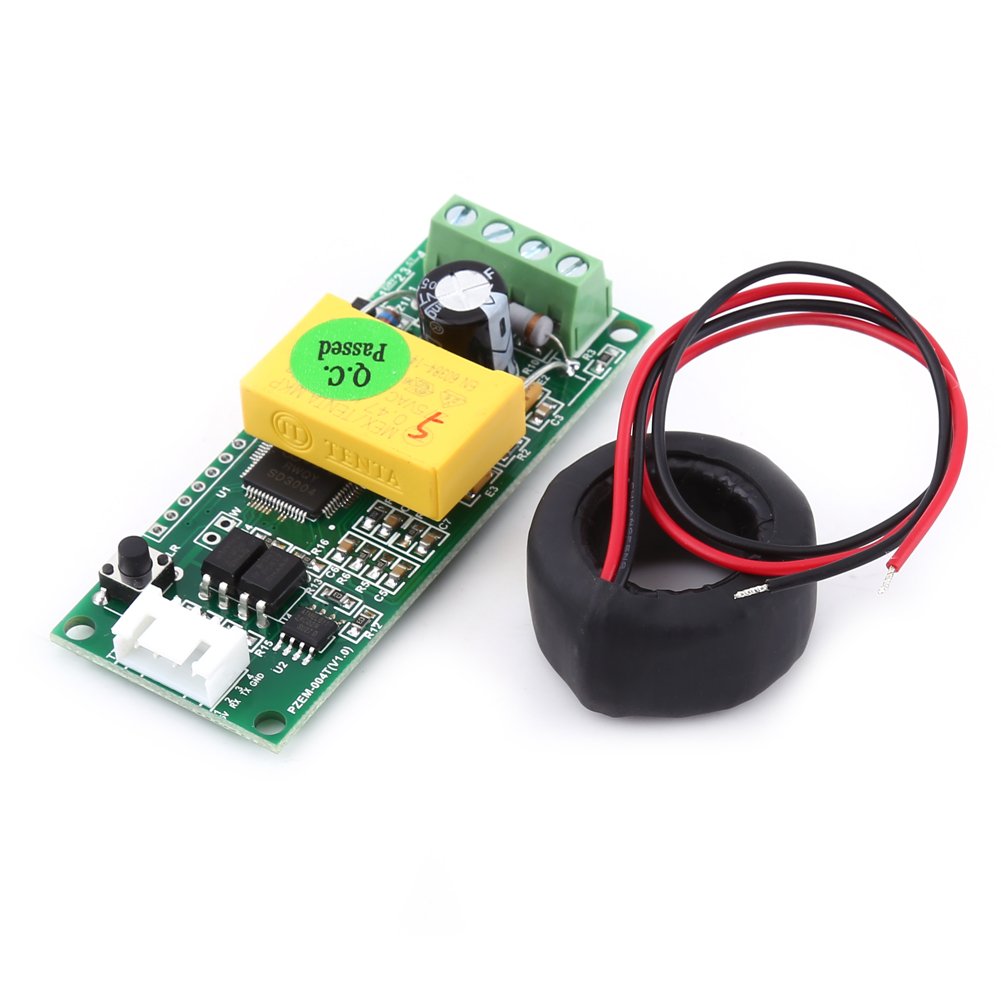
Depending on the specific PZEM sensor and current coil used, calibration might be necessary to ensure accurate readings. Calibration factors or correction values can be stored in the Preferences. Current Coil (CT Sensor): A current coil is a type of current transformer used to measure alternating current (AC) flowing through a conductor. The CT sensor used with the PZEM-004T is generally non-invasive, which means it can be clamped around the wire without disconnecting it, making it easy to install and safe to use. Versuche es mal so (PZEM Rx und Tx habe ich getauscht) und wenn es auch nicht geht drehe hier mal die Dioden. Wie speichert sich das im Wemo? Wird das überschrieben, wenn ich den Update? Meine Idee ist, dass ich den mal komplett resette und alles von vorne mach. marcuskl ist bei dir die Anzeige genau? Oder hast du manchmal auch Abweichungen, die man nicht zuordnen kann?
Assistance with Modbus and PZEM-004T - Configuration - Home Assistance with Modbus and PZEM-004T - Configuration - Home
As I stated in the previous article, that the PZEM-004T V3.0 module is an upgraded version of PZEM-004T V2.0 and also the protocol for communicating the interface is different, the library program for PZEM-004T V2 cannot be used for interface with PZEM-004T V3.0. Malaus schau mal ob die Dioden richtig verschalten sind, eventuell mal die Dioden drehen, bei mir waren die Dioden falsch markiert. Spannung erst bei den PZEM Modulen einschalten und danach der Wemos! Los gehen die Messungen, Viel Spaß! Many thanks to all the other contributors that add new features, find bugs and generally keep this project afloa. I read 24 mV (resolution 1 mV) at 50 A indicated (50 mA secondary current), which makes the instrument appear as a burden resistance of 0.48 Ω (±4% resolution error at least).Und beim Ground, ist alles miteinander verbunden. Also Wemo, die Geräte und das Netzteil. Oder benötige ich da nochmal einen zusätzlichen Ground? Cut the power cable in two and connect the input wires to both Sonoff Basic and PZEM-004T. Route one of the power output wires through the PZEM-004T core and connect the output wires to the Sonoff Basic output. if you want to test first on a regular PI (not ha os), I found this one to work on the v3.0 usb ttl, to test (so independently of HA)
GitHub - olehs/PZEM004T: Arduino communication library for
I’ve also noticed that since adding in Modbus, my startup and shutdown/restart times are significantly longer, with 2021-08-17 08:10:04 ERROR (SyncWorker_6) [homeassistant.components.modbus.modbus] Pymodbus: Modbus Error: [Input/Output] Modbus Error: [Invalid Message] No response received, expected at least 2 bytes (0 received) scattered throughout my logs. It is recommended to use GPIO1/GPIO3 or GPIO13/GPIO15 for the most reliable serial communications. When using other GPIOs software serial will be activated and used. GPIO After testing the sensor, we can now interface it with the dashboard to upload energy readings online. I have copied my code below, and for what you are looking for I think could be done with ESPHome Automations, use spare GPIO as switch and use the values as sensors.Die Dioden habe ich im Tx Strang verbaut. Nur die zusätzliche Versorgung hab ich nicht drin. Es funktioniert auch ohne. Ist die einfach nur zur Unterstützung des Bus da?
 Great Deal