About this deal
I mainly tested the microscope with SMD soldering. For that, this screen works great. It is big enough not to need a larger, external monitor. This is often necessary when working with microscopes with smaller built-in monitors. The HDMI output is clear and provides you with more detail than the built-in screen, which has a 1024×600 resolution. Usually the built-in screen is more than sufficient just by itself, however. On the front of the microscope monitor we have got multiple buttons the Power ON/OFF, Mode/Menu, Digital zoom in, Digital zoom out, OK/Start video Record, Picture capture, infrared sensor, and the focus controller. Where earlier versions of digital microscopes required connections to computers or external monitors, they now come with built-in screens. This lets you use them as a stand-alone device.
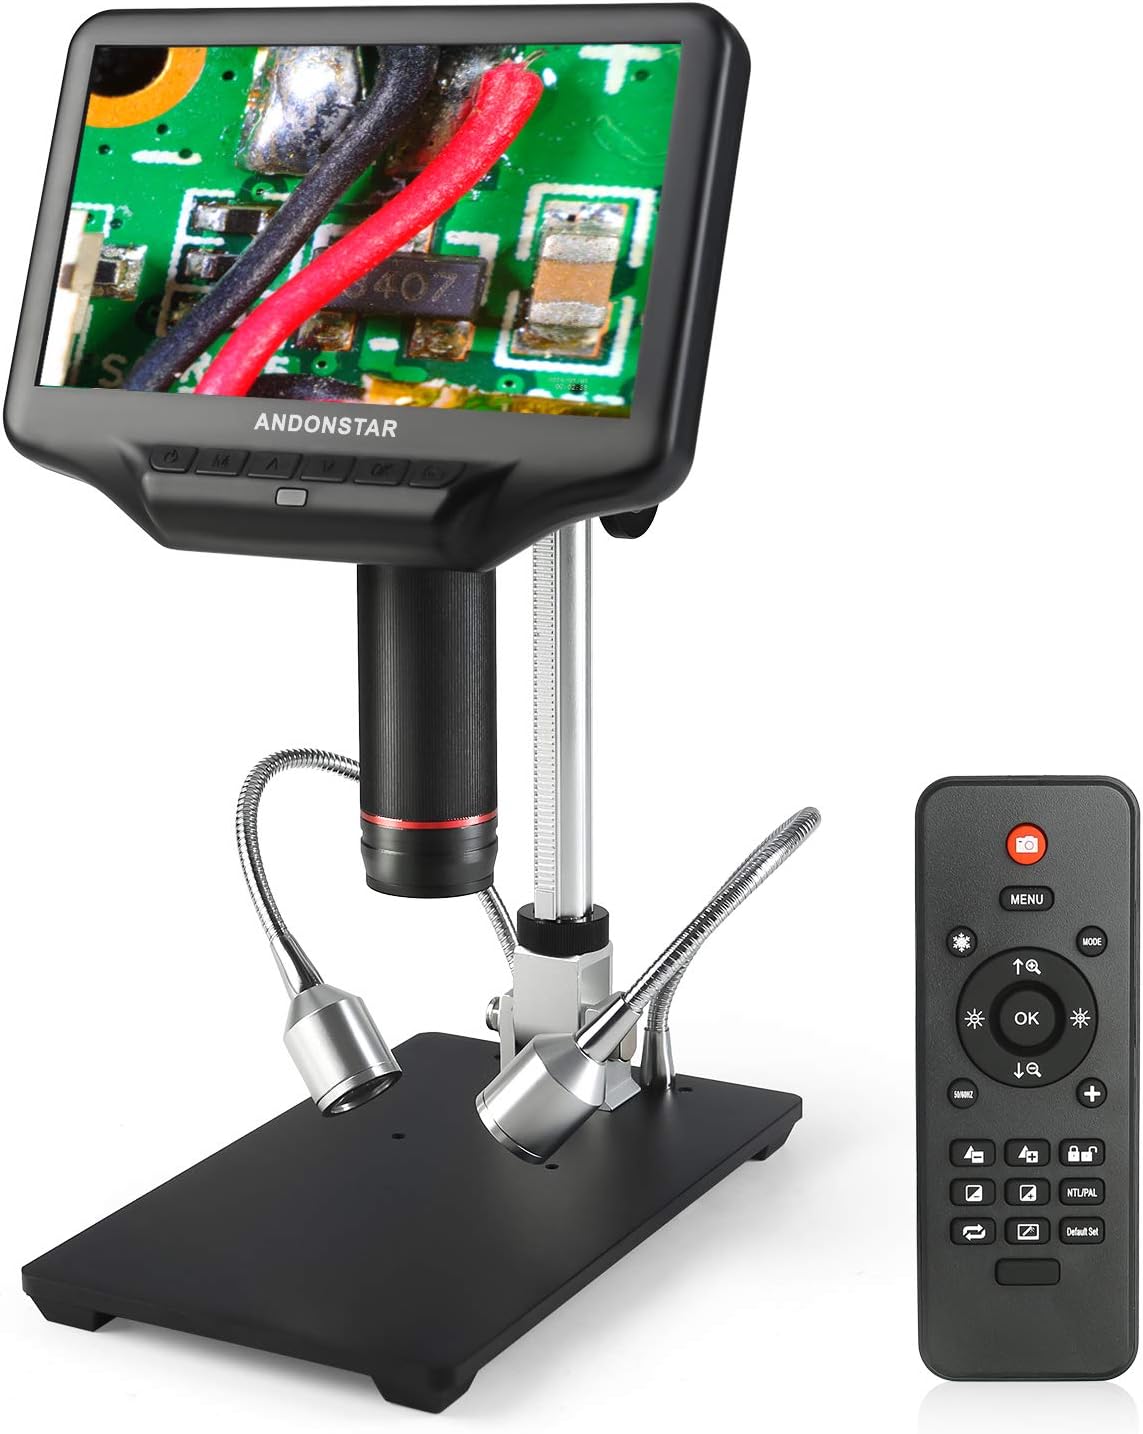
Andonstar AD407 3D HDMI Digital Microscope with 4MP UHD and 7 Andonstar AD407 3D HDMI Digital Microscope with 4MP UHD and 7
If you do want to see your work on a larger screen and in a higher resolution, you can use the HDMI output port. There is no setup involved. Plug the included HDMI cable into the microscope and the other end in your monitor, and you are good to go. Short press the M button to switch between different modes “Video and image”. The same thing you can do by pressing the Mode button on the remote controller. If you have watched my video while testing this digital microscope, you might have noticed, when I press the buttons on the monitor it shakes a lot, so to avoid this you can use the remote controller. For each height you can set the lens to (focus distance), there is a specific size area (field of view) visible on the microscope LCD screen. I have listed them below, so that you can get an idea of how big of an area you can view at once under the microscope. HeightThis is crazy, look at the details, the image is quite sharp and now I can easily read the code which is R2X. We will test so many other things, but first let me explain how to use the menu. The box also contains a set of spring-loaded PCB clamps that you can attach to the base. These aren’t mentioned anywhere in the assembly instructions or manual. You can install them as follows: This is simply amazing, this tiny component as compared to my cell phone is now of the size of a cell phone or even larger, I can clearly see each and every detail. I don’t see any prominent noise. But, if in case you see any noise then you can reduce the situration and contrast values on your TV and it will completely remove the noise. Anyway, using the zoom in and zoom out buttons on the remote controller, you can further increase enlarge the subject. Similarly, you can use the remote to change the exposure settings without having to dive into the settings menu, and to adjust the digital zoom without using the hardware buttons. It is a useful addition to the microscope, but if you only use the microscope for SMD soldering you will likely not be using the remote much. Also included is a UV filter. It is not used to filter out UV light however. Its main purpose is to protect the front lens element from soldering smoke and accidental damage. It makes for easier cleaning than if you would have to wipe down the tiny lens itself.
ad407) for PCB Looking for a digital microscope (ad207 vs ad407) for PCB
More than just a microscope】 With a Micro SD card, you can easily capture and store images or videos of the microscopic world you observe. (recommended to use class 10 high-speed memory card, up to 64G)The quality of the photos is okay. They tend to be less sharp and more noisy than what you actually see on the built-in screen. Levels Adjustable LED Lights】2 metal base plate side lights, a total of 8 intensity levels of LED lights, the light body can be bent and the angle can be adjusted, which can meet your different requirements for image brightness and lighting angle to get the best image effect. Placing SMD components on a PCB was never so easy. The Andonstar AD407 Pro Digital Microscope is best for Soldering and repairing jobs. This digital microscope will meet all your soldering and repairing requirements, it can even turn out to be the best Digital microscope for mobile repairing. So, that’s all for now. Now the same exact thing you can do quite easily while using the remote controller.With the wireless remote controller, it is convenient for you to operate from a long distance, and supports functions such as image discoloration and digital zoom. It is especially suitable for demonstrations and other scenes. Easily take photos and videos, and avoid the shake that affects the picture quality caused by pressing the screen buttons.
Andonstar AD407 Pro HDMI Soldering Digital Microscope Andonstar AD407 Pro HDMI Soldering Digital Microscope
We also liked that the scope has a remote control so you can operate it without touching it. We’ve used scopes where pushing the buttons to do things like snap a photo sometimes causes vibrations or worse when you are trying to focus on something specific. Compared to digital microscopes, stereo microscopes have increased image quality, let you see depth, and tend to be more durable. They are significantly larger and more expensive, however. For more details, refer to the Digital Microscope AD407 Pro user manual.Now, I am going to connect this monitor screen to my Smart TV using this HDMI Cable. Andonstar AD407 Digital Microscope Testing:
One downside of the remote is that (at least on my unit) I need to point the remote exactly at the IR receiver for it to work. So occasionally I need to re-aim and press the button again if nothing happens. UV Filter
Andonstar Product – Andonstar
This is the Power cable, plug in the USB in the Microscope Monitor USB interface. Use the Spotlight interface on the power cable to power up the LEDs.First, plug in the USB into this AC to DC adaptor to supply the required voltage.Press the power button to turn On the Spotlights and the Microscope Monitor anduse these + and – buttons to increase and decrease the brightness. Anyway, if you long press the M button it will open the menu and then using the arrow keys you can scroll through the menu items and use the Ok button for the selection.As you can see, videos are saved in the full 16:9 aspect ratio, so no information gets cropped off like with images. I have used both and can tell you that having a stereo scope with variable zoom is the best addition (beyond a really good solder station) that you can make to your electronics bench, and you will find it increasingly more useful as components get smaller and your eyes age. Keep your phone setup for taking photos, but there’s a difference and versatility that you’ll have to experience to understand. The software of the microscope does what it is supposed to do. You can find several settings for controlling the video output (resolution/frame rate, output frequency, time stamp). There are additional settings that let you alter the image on the built-in screen (3x digital zoom and exposure control). Another way to increase the working space is to install the lens by clamping it at the bottom, instead of at the top. The bottom of the lens has a fixed area that the thumbscrews can grab on to.
 Great Deal