About this deal
Take great care when sawing your railway sleepers. Credit: @the_scaffold_furniture_co Step 4: Sand everything down For cutting your measured lengths, you will need to start with the circular saw. Place the railway sleeper on your workbench or another solid surface to work on. Put on all your protective gear and get the saw ready. Once you’re ready, take the saw and follow the lines you’ve drawn to cut the wood. If the circular saw doesn’t cut all the way through, you might have to use the handsaw to finish the job. Now that you have all your measurements, you can start with preparing your railway sleepers. For this part, you’ll need a handsaw, circular saw and of course the marked railway sleepers. Now you’ll need the sander again to gently taper off the edges of the dowels. Don’t throw away any scrap pieces since you’ll be using those to hide the hex screws later.
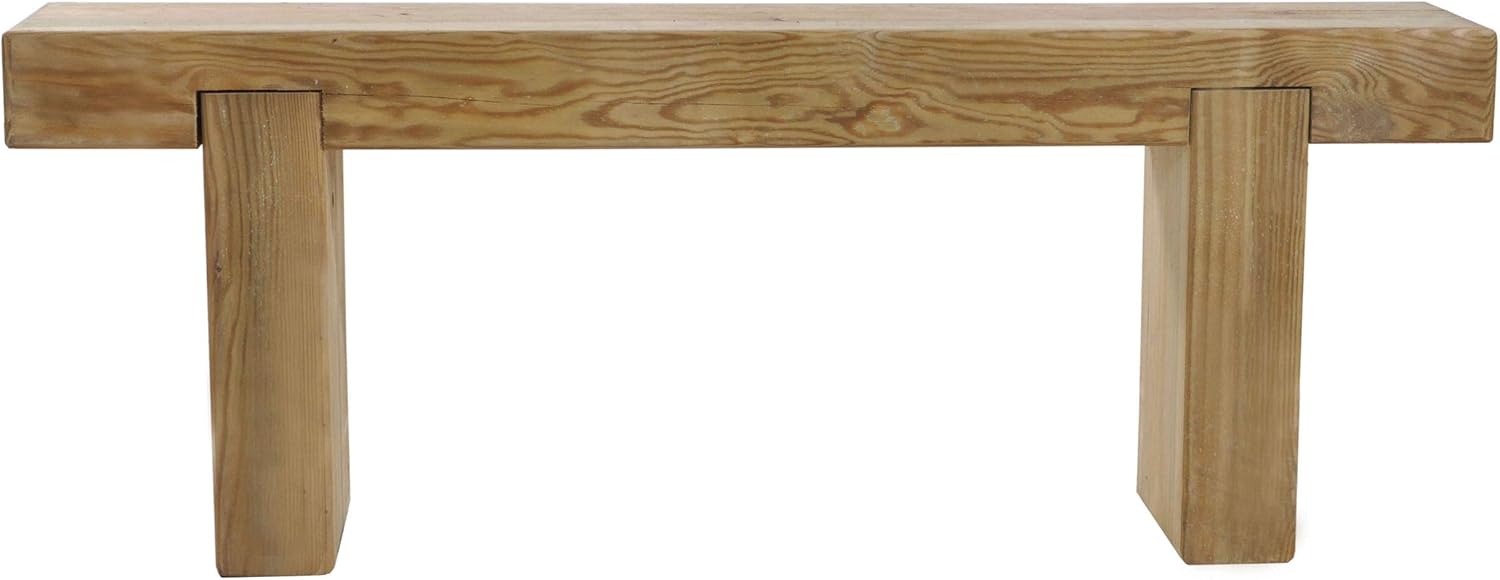
Sleeper Bench - 1.8m - Forest Garden Double Sleeper Bench - 1.8m - Forest Garden
The Sleeper furniture range from Forest has been designed to be mixed and matched in any configuration to create the perfect seating area to suit your garden
You may also like
Using the Double Sleeper Bench 1.8m from Forest is a great way to make the most of your garden during the summer months Coffee tables have a standard height of around 40 – 45 cm (16-18 inches). This is also the perfect height to sit on if you want to use it as a bench instead.
Sleeper Table - Etsy UK Sleeper Table - Etsy UK
Before you get yourself too hyped up to think, remember you’ll need some supplies and tools to make your dream a reality. Here is a list of the tools and other materials you’ll need: You will need the spade drill bit to create the pilot holes for the auger drill bit. To make everything look neat, place the dowel holes an equal amount of space from the edges of the wood on both legs.
Measure out the sections you want by starting with the seat/surface area. This area will be a bit longer than the rest of the structure. You could even use the whole railway sleeper if you’re going for a long sleek design. Make sure your auger bit is the perfect size by holding it up next to the dowels you intend to use. The bit and dowel should be very close in size with the bit just very slightly bigger to create a tight fit. Hammer your first dowel in place to make sure the fit is tight enough. If it works, continue drilling the rest of the holes for the remaining dowels.
Forest Garden Forest Sleeper Bench 1.8 m, Pressure Treated Forest Garden Forest Sleeper Bench 1.8 m, Pressure Treated
If you don’t want to damage your wood while hammering the dowel in place, either use a wooden mallet or an offcut and a metal hammer. The offcut will protect the wood underneath from getting damaged by the metal hammer.The Sleeper range is manufactured from Pressure Treated timber that has been smooth-planed for a splinter-free finish, ensuring it is comfortable and safe for children too. The timber is FSC certified from sustainable sources and comes with a 15 year guarantee against rot and fungal decay.
Forest Sleeper Garden Bench Pressure-Treated - Screwfix Forest Sleeper Garden Bench Pressure-Treated - Screwfix
Use your method of choice and hammer all the dowels in place. You can put a bit of glue in the hole to make it extra secure. Once you are sure, you can place some wood glue on the areas where the leg attaches to the top railway sleepers. Again make sure everything is perfectly lined up. To keep everything stable in place, you can put in a long hex screw. You most likely have long uncut railway sleepers to work with. To make your design a reality, you’ll have to do some measuring and planning. To place the screws, drill a small pilot hole. The head of the screw should not be visible above the rim of the hole and also leave some space for a filling that will come later on. Once ready, secure everything together with the screws inside the pilot holes you just created. Step 6: Secure the dowels in placeBefore drilling, make sure to start in the centre of the plus sign where the lines cross. Drill until you’ve drilled through the top railway sleeper into the one functioning as a leg. You can now either switch drill bits or continue on to the next cross. If you continue on, drill all the pilot holes before switching your spade bit for the auger bit. You can use your pencil and crows foot to draw a diagram to help you to line up where they need to go. Start by finding the centre of the leg and draw a grid line over the top to tell you where it is. Once done, you can find the centre of each individual railway sleeper that makes up the tabletop and draw a cross over your previous line. You should now have a + sign everywhere you need to drill a pilate hole. Do the same on the other side. Using a sander will make the job much faster than doing it by hand. Make sure to use safety glasses and a mask for this part of the project. The fine dust particles can cause serious problems if inhaled. Also, make sure the room is well ventilated if sanding indoors. Step 5: Assemble the table/bench Line up your table legs and place the two or three railway sleepers that will make up the seat/tabletop on top of the legs. Before you start to secure anything, move the legs into position. Measure the distance from the edge to the leg to make sure both sides are the same.
 Great Deal