About this deal
If you are considering buying a polytunnel, a kit can be a great way to go and save you hundreds of pounds on installation. Additionally, building a polytunnel from scratch is probably easier than you think – we often say that building a polytunnel is a bit like putting together giant meccano. To build a standard polytunnel kit, you will need an additional pair of hands and some basic tools. Many customers build their tunnels over a weekend, but there are a number of factors that determine how long it takes – the size and specification of the polytunnel, digging conditions, weather, and DIY skills all factor into the time it takes to build a kit.
Building a Polytunnel from Scratch - Premier Polytunnels Building a Polytunnel from Scratch - Premier Polytunnels
Now you are ready to connect the hoop sections together. These will form the tunnel’s hoop frame structure and can be slid into place over the foundation tubes.
Polytunnels
Primarily, the cover is only held on to the frame using six pieces of Velcro, and there is no way to secure it to the frame in the middle. Therefore, it may be necessary to engineer additional ways to attach the cover to the frame when it arrives. Assembly is straightforward, with galvanised steel hoops that support the polypropylene fleece. They push easily into the ground, and are threaded through the fleece, so all you need to do is extend the tunnel out like a concertina. It also folds up easily too. Follow the instructions set out in this guide to learn how to build a polytunnel DIY style. DIY Polytunnels Construct the frame– this is like a giant puzzle, making sure that all the right pieces are connected together to make the giant hoops, with storm braces, that form the tunnel structure. But there is no need to worry, we have all the helpful instruction guides and videos you need.
3x2 Polytunnel cover | Suttons Garden Grow 3x2 Polytunnel cover | Suttons
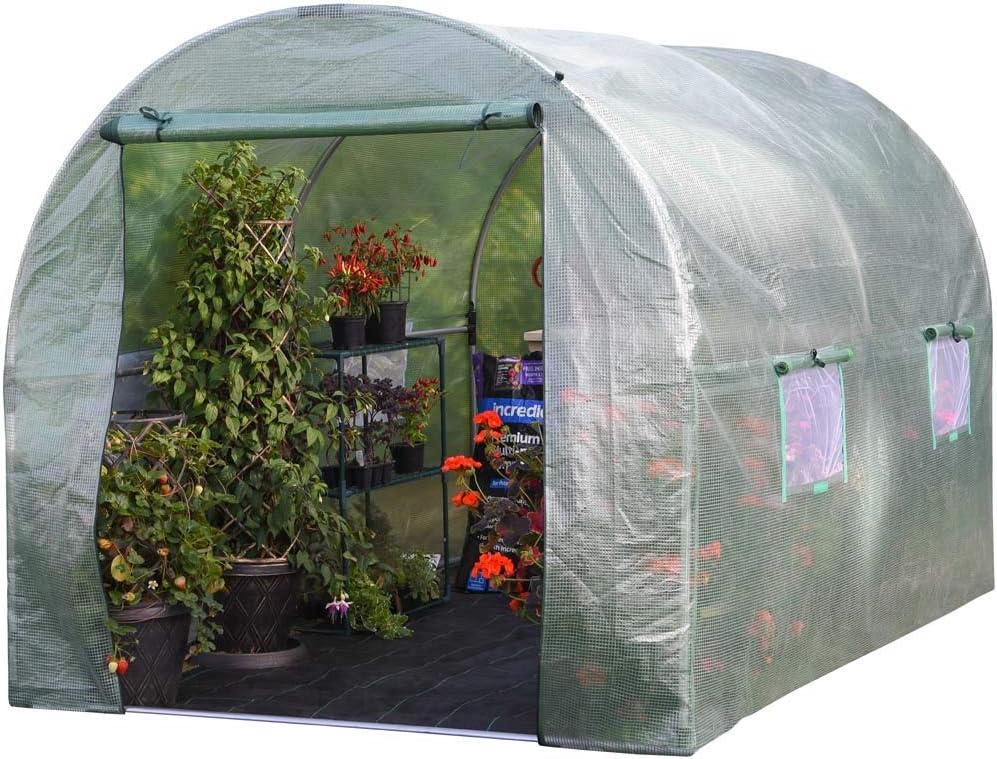
If you do not have purpose-built housing you could use a garden shed or polytunnel, as long as there is adequate light, space and ventilation.’ However, it should be noted that the zips are not very robust, and some gardeners have reported that the zips can become damaged or broken after prolonged use. Because of this, it’s necessary to be cautious when opening and closing the entryway. Whether you’re new to gardening or a seasoned pro, for in-ground growing with the protection of a PE cover, choose the VonHaus Polytunnel Greenhouse . Green polythene absorbs a lot of the red-light spectrum. As a result, it’s particularly beneficial for plants which thrive in green-light spectrum conditions. Fleece One of the main benefits of having a polytunnel is being able to control the environment that your plants and produce are growing in.PLANT PRIORITY: A strip window runs down one side and is fitted with mesh to keep bugs out whilst allowing ventilation, a clever feature allows the plastic flap to be clipped up creating a water catcher which funnels water to the end allowing you to place a water butt under it. The weldmesh basket easily supports pots, planters or compost bags while allowing bits of soil to run through so the trolley stays clear of debris. In terms of assembly, this reasonably heavy-duty polytunnel is straightforward to put up. Due to its large size, the process is greatly aided by the help of two people. The written instructions are basic at best, and nonsensical at worst, but there is a labelled diagram to help as well – the poles are numbered, and it’s all relatively intuitive. Expect the whole process to take around 2 – 3 hours. Foundations are the first step. Ensuring each of the foundation tubes is placed correctly is crucial, so take your time marking the positions and ensuring they are correctly and evenly spaced. The standard method is to dig a trench around the polytunnel, then bury the polythene in the ground to deliver tension and keep it in place.
Polytunnels Products - Robinson Polytunnels
Measuring 6 x 2 m, this is a suitable choice for medium-size allotments. There are 2 metres of headroom inside the tunnel as well, so for many people – up to approximately 6’5”– there’s no need to stoop.With a helper (or several depending on the size of polytunnel), roll the cover out along the side of the tunnel and pull the polythene over the entire frame, ensuring you have the same overhang down each side and end of the tunnel. It does not offer a lot of heat protection and therefore is best used in summer, not in winter. Some crops will not appreciate so much direct light. Polythene with an Infrared Additive Controlled environment. The climate inside a polytunnel is far easier to control than the climate outside. You’ll be able to control the temperature to some extent, and there’s less risk of rain, wind or frost damaging your plants. Ideally, you want to place your polytunnel somewhere where it won’t be subjected to a lot of wind. Unfortunately, you may not have much choice – your allotment is in a fixed position, after all. Here you’ll find more information about positioning and reinforcing your polytunnel to protect it as much as possible. Positioning Your Polytunnel
 Great Deal